Frequent adjustment is a must for bike brakes because they become less effective over time. The cable stretch and pads started wearing out after some time. So, it is essential to maintain the brakes properly for ensuring safe riding. This guide will show the methods for bike brake handle adjustment.
As you have to do such adjustments on a routine basis, you should learn the process. These processes are very easy to understand and apply. You just have to adjust the brake handles, pads, and cables. It will allow you to brake the cycle effortlessly, and you can stop the bike more quickly.
How Do I Adjust My Brake Handles? (Step By Step)
While adjusting the brake handles, you need to set up the brake pads, handles, and cables as well. Worn-down brake pads can be a safety hazard with their too low or high rim. On the other side, too loose brake cables will make it hard or tough to brake. The most powerful electric bike works so fast that you have to be very careful with its brake. So, here we are going to show how you adjust the brake handles.
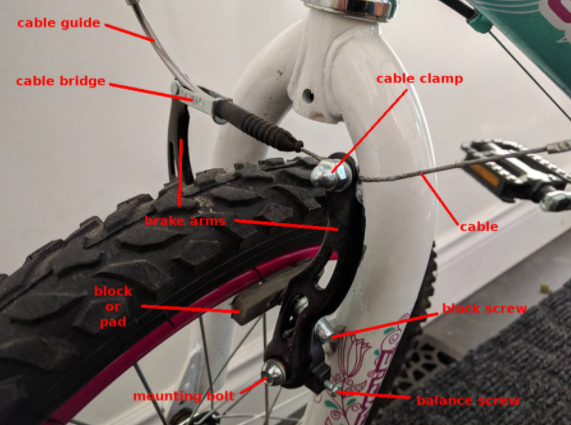
Step 1- Adjust the Brake Handles
Sometimes too much cable is put into the brake handle because of a crash or fall. This thing loses the handle cable and pushes them too much in it. Simply lose the brake handle’s lock nut to adjust this cable. This will readjust the cable and remove the handlebar’s tightness. If the cable stripped too much, cut the top extra part of it.
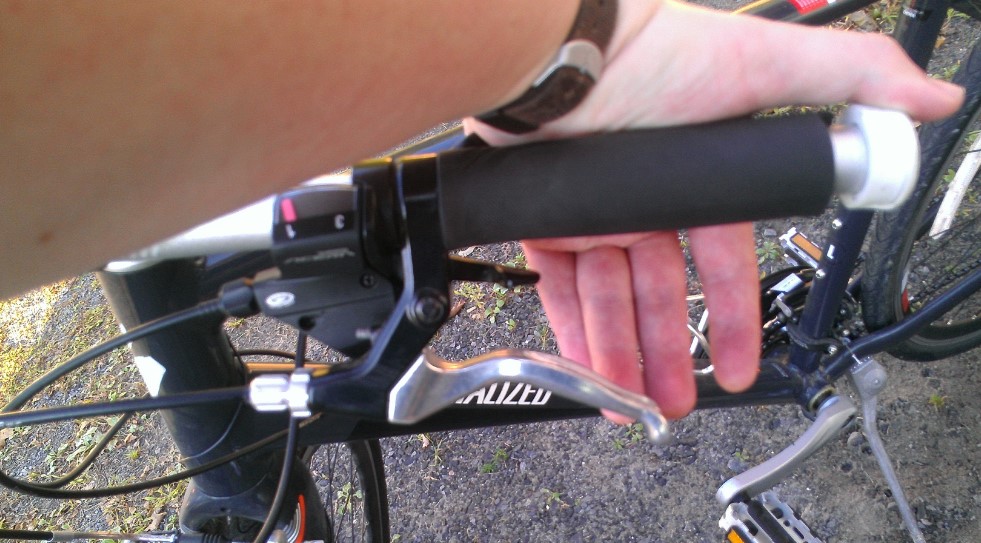
Step 2- Adjusting the Brake Pads
To start the bike brake handle adjustment, at first, you have to adjust the brake pads. Follow the below methods to do this task.
Check the brake pads:
When you pull the brake lever, the brake pads clamp down on the bike’s front tire. Before adjusting, you have to replace the pads if the worn-down brake pads pass the “wear line” label.
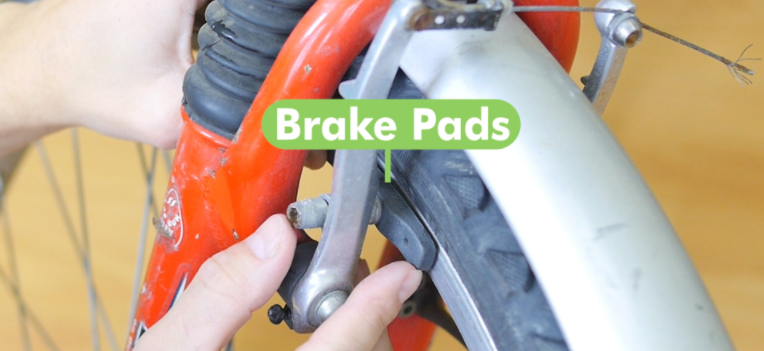
If your bike doesn’t have a labeled wire line, then you can find them on the pad’s side marked by grooves. Keep the wheel lines correctly up in the dropouts. Otherwise, it will fail to make good contact with the brake.
Squeeze the Brake:
At this time, see where the pads hit the rim by squeezing the brake lever. Make sure both the brake pads contact the front tire’s rim at the same time. Also, they should use an equal amount of pad space while hitting the rim’s center.
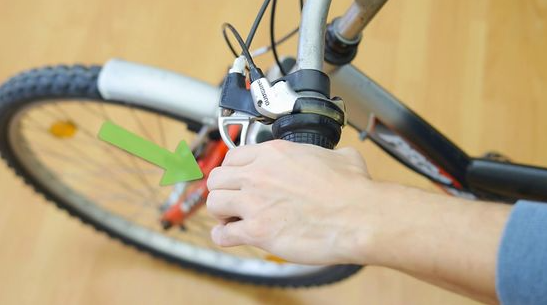
Look out if they contact the bike’s rubber tire or the spokes. If they contact them that means the pads are using too high or low pressure for hitting the rim. If the bike comes with a quick-release mechanism, inspect that it is not loose. With a loose mechanism, the wheel can’t hold the brake tightly.
Place and Retighten the Brake Pads:
You will need a Allen wrench at this stage for losing the bolts of the pads. Now, move the Allen wrench counterclockwise and make sure not to lose the bolts entirely. Otherwise, the brake pad will be removed from the pad holder.
Now move it upside or downside and see if they are too low or high. With too low and high pads, you have to move them up and down until they come to the center. Until the bolts get fully tightened, keep turning the wrench. If needed, you should readjust and ensure the pads are placed in the center.
Step 3- Tightening the Brake Cables
The brake handle lever’s resistance level determines the efficiency of pushing the brakes. By adjusting the brake cables, you can ensure this efficiency.
Test the Cable Tightness:
To test the tightness, you have to pull the brake levers. While pulling them, ensure they are 3.8 cm away from the handlebars grip. If they hit the handlebars while pulling, that means cables are too loose.
Adjust The Barrel:
You can lose the barrel adjusters to fix the loose cable. Where the brake cable contacts the levers, you can find the barrel adjusters there. Turn the barrel adjusters counterclockwise for losing it. The loose barrel can help the brake cable to get tight.
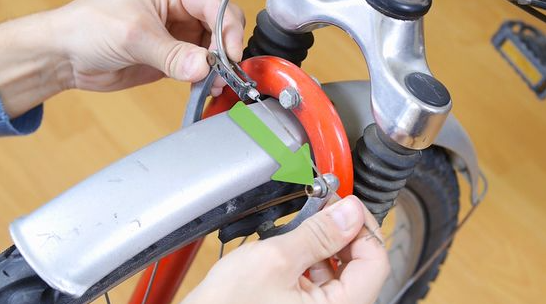
To ensure it fixed the problem, pull the brake lever after losing the barrels adjusters. If the cable is still loose, adjust it on the caliper. It is the brake’s main-frame, and the brake pads are connected to the caliper. Hold the caliper’s brake cable and locate the bolts. Then, slightly loose the bolt by turning it counterclockwise.
Tight the Brake Cable, Bolt, and Barrel:
Now pull the brake cable to the outside for tightening the brake pads. It should be tight enough to ensure some resistance for turning the tire effortlessly. Again use the 5 mm Allen wrench to tighten the bolt from the caliper.
Lastly, tight the handlebars barrel adjusters. It will loosen the brake pads and make the brake cables set. Now pull the brake levers to test the cables. Make sure there is a 3.8 cm gap between the handlebar’s lever and grip.
You should learn these necessary steps very carefully. If you ignore the bikes, brake maintenance and repairing this can create a huge hazard. Your bike’s brakes can fail and cause damage to you.
Conclusion
After seeing the bike brake handle adjustment steps, now you can realize that it is not that complicated. You can make these small and simple adjustments by yourself. The only things it will require are some tools. As an improper brake can be very dangerous on roads, it is essential to take care of them.
Now that you learned the adjustment steps from the guide, practice them frequently. It will help you to make constant adjustments confidently in any situation and place without other’s help. Remember, proper maintenance of brake handles is the key to safe riding and best performance.

